Finished: Needlepunch Embroidery Bee
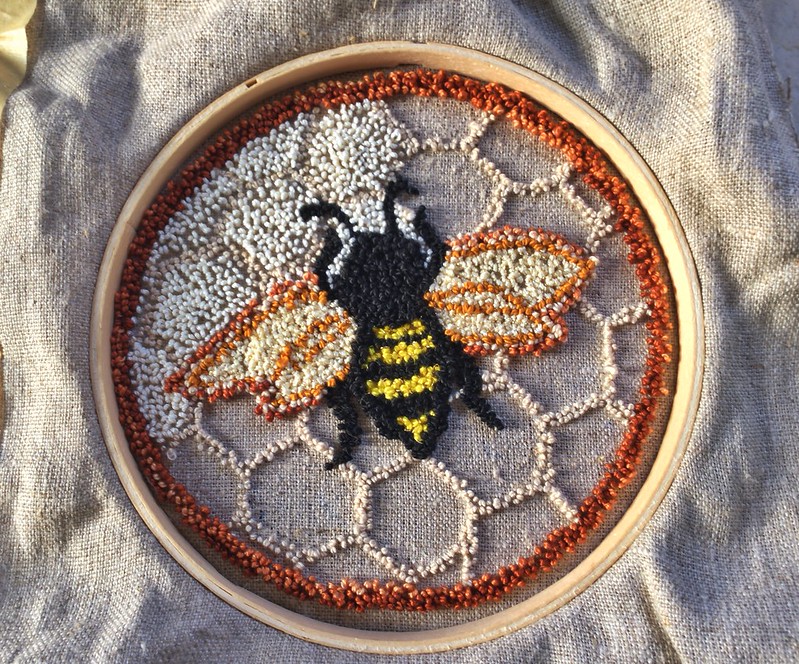
Finished except for the finishing.

(front)

(back)
Finished except for the finishing.
(front)
(back)
It’s not weaving… what can I say? It’s summer, and I’ve been in a weaving lull, and I needed a change.
(front of an unfinished project, the loopy side.)
I’ve become smitten with a form of embroidery called needlepunch. It’s like a miniature hooked rug. Maybe this is a trend? Or was? I may have missed it, but I know it’s been around for quite awhile and there are numerous tutorials on Youtube, so that probably means it’s a trend. It’s new to me, however, so I’m finding it one of those things that gets my imagination going.
The process is simple and almost feels like coloring–with a razor-sharp needle. Mine’s the Ultrapunch. It’s threaded with embroidery floss or crochet thread, and then you punch through the wrong side of piece of fabric held in a hoop or frame, leaving a flat stitch on the back and a loop on the front. These loops can be pulled out easily from the back, but they’re very secure from the front.
The size of the needle and depth of the loop can be changed on my needle, so I can do a very minimal loop or a pretty substantial one. The taller loops cover more fabric surface, so the shorter loops, like in the honeycomb in my bee design, are allowing more background fabric to peek through. I don’t mind because I like the look, but I can imagine with some designs it would be annoying.
Eventually, after enough loops and stitches are clustered near each other, a section is built up and your design appears. Each time you want a color change, you re-thread your needle. The final feel is a cross between terrycloth and a rya rug. Most pieces run on the small side, less than 12″ square. My little bee design measures just 5″ across. This is a decorative craft, although I suppose you could find ways to make patches or bags out of the finished pieces to turn them into useful items.
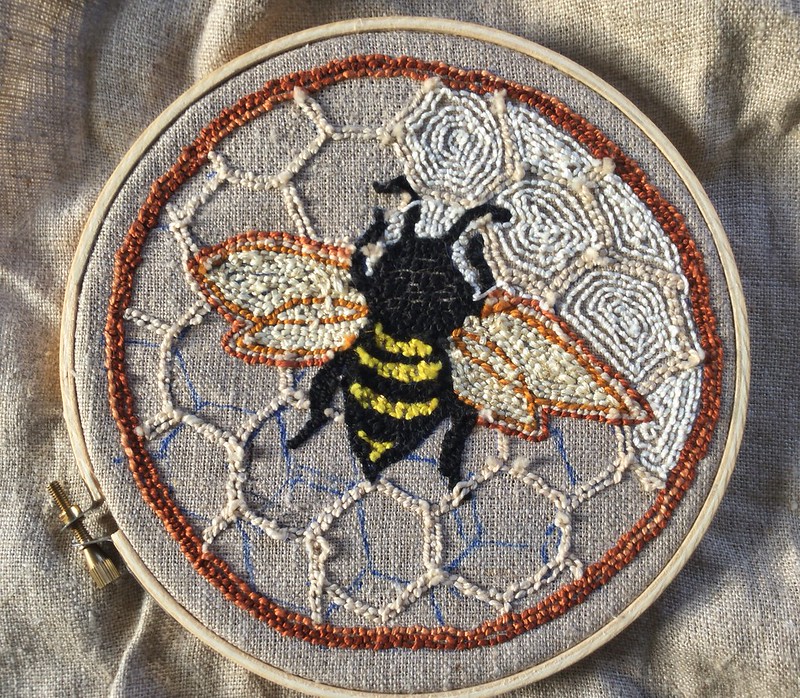
(back of project, with all my scribbles)
Tension of your working fabric is important, and it’s something I’ve been struggling with using the bamboo-type of embroidery hoops that I own. I have to stop and tighten the fabric every few minutes, so I purchased a few new hoops, and I hope they grip better. Some “punchers” buy frames that hold the fabric in place with sharp metal tines. They’re rather pricey, but I bet it would do the trick. I also purchased what’s called weavers cloth for the fabric, which is a tightly woven, 50% cotton, 50% polyester blend. I’m using a linen needlepoint fabric right now, and it stretches out very easily.
My first little design is coming along. A wanted to embroider a bee, and the hive idea came second. If I would have thought it through, I may not be struggling right now with how the background is overwhelming my poor little bee. I plan on re-outlining the wings.

(my initial plan for wings was far more detailed than I could render)
I’ve learned a lot about needlepunch, including…

(my first teeny samples, just a few inches across)