Ashford Sampleit Video
The Ashford Company has put out a video on warping and weaving a scarf on the little Sampleit Rigid Heddle loom:
The Ashford Company has put out a video on warping and weaving a scarf on the little Sampleit Rigid Heddle loom:
Threading tablet or cards for weaving is something that will take me awhile to understanding. It’s basic, really. You either send the threads (four in my case) through each hole from the back to the front, or from the front to the back. This is designated in drafts with arrows that shoot downwards or upwards. Sometimes this is referred to as a “Z” or “S” threading. You’re supposed to be able to imagine the yarn coming through the holes and slanting over the front or backs of the cards. Neither the arrows nor the letters help me understand, and I continue to confuse my threadings.
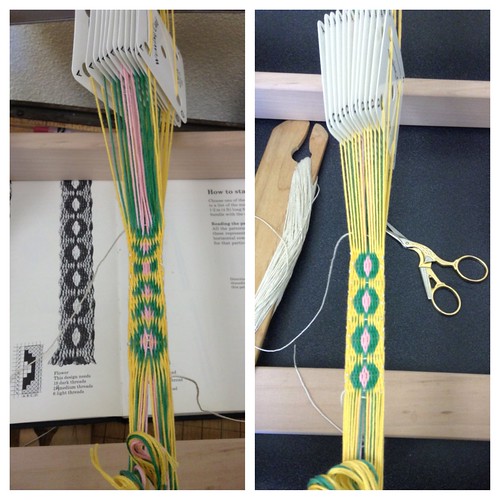
Shown here is a very basic tablet weaving pattern that creates little circles with centers. I think it’s sometimes called a flower pattern. On the left is my first attempt (on the bottom of the weaving–the other sections were just samples). I had the left side and right sides threaded in the wrong direction and so the flower was stretching out, more like a starburst. Once I unwove, re-threaded each card, and started over, it looked correct.
My solution: I’m going to carry a cheat sheet and tape it to my loom. Sometimes, a brain gets too full of instructions.

Another new adventure… tablet (or card) weaving. It’s simple and complex at the same time. Simple because the “ingredients” are basic: cards, yarn, a shuttle, and off you go! Complex because the designs are truly astounding. This method of weaving also made me stop and think, because it involves a “twist” in the motion of using the cards, and that combines individual threads to create color changes and a nubby texture. It’s really a wonderful craft.
My first sample was done on an inkle loom with two colors. That method of threading and warping is very easy compared to most introductory tutorials where you cut individual threads for every card. However, once you get into a variety of colors, you may need to understand the second method.
This pattern was more complicated than my first sample. I found it here. It turned out, so I’m pleased.
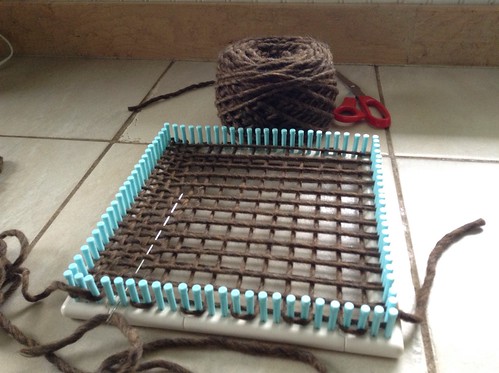
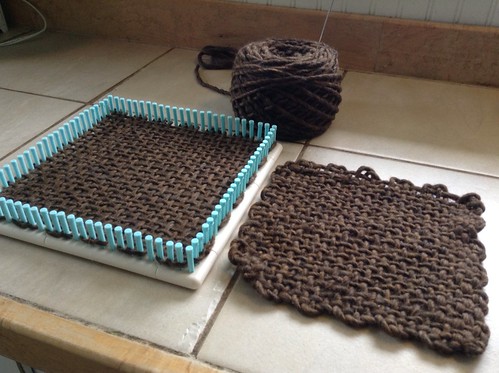
I bought a Martha Stewart Knitting and Weaving Loom, mainly because I wanted the flexibility to make different sizes. Plus, I liked that the smaller pegs created a small gauge loom with the pegs measuring 3/8″ apart. So far, I’ve used it in three ways: the big square (13″?) to weave some “Weave-It” style potholders out of super bulky yarn; the small square (7″) to weave a continuous weave potholder; and a circle, to begin knitting a garter stitch washcloth… dishcloth. We’ll see how it goes.
Although it’s nice that it breaks into pieces, which is always a plus, the negative is that the pegs are removable, and they do pop out. I tried very hard to keep them secure, but the blue (smallest) pegs were very irritating with purling a stitch, which puts some tension on the peg as you lift the loop off.
I imagine using this when I’d like the smaller gauge or playing around with the squares. If I had to do a larger project, I think I’d try the slightly larger pegs first to see if that would help.